【Efinix Ti60】TinyML+Vision: YOLO人臉辨識
3/18/25...About 2 min
【Efinix Ti60】TinyML+Vision: YOLO人臉辨識
本專案範例可在官方 TinyML repo中的tinyml_vision\Ti60F225_yolo_person_detect_demo找到。
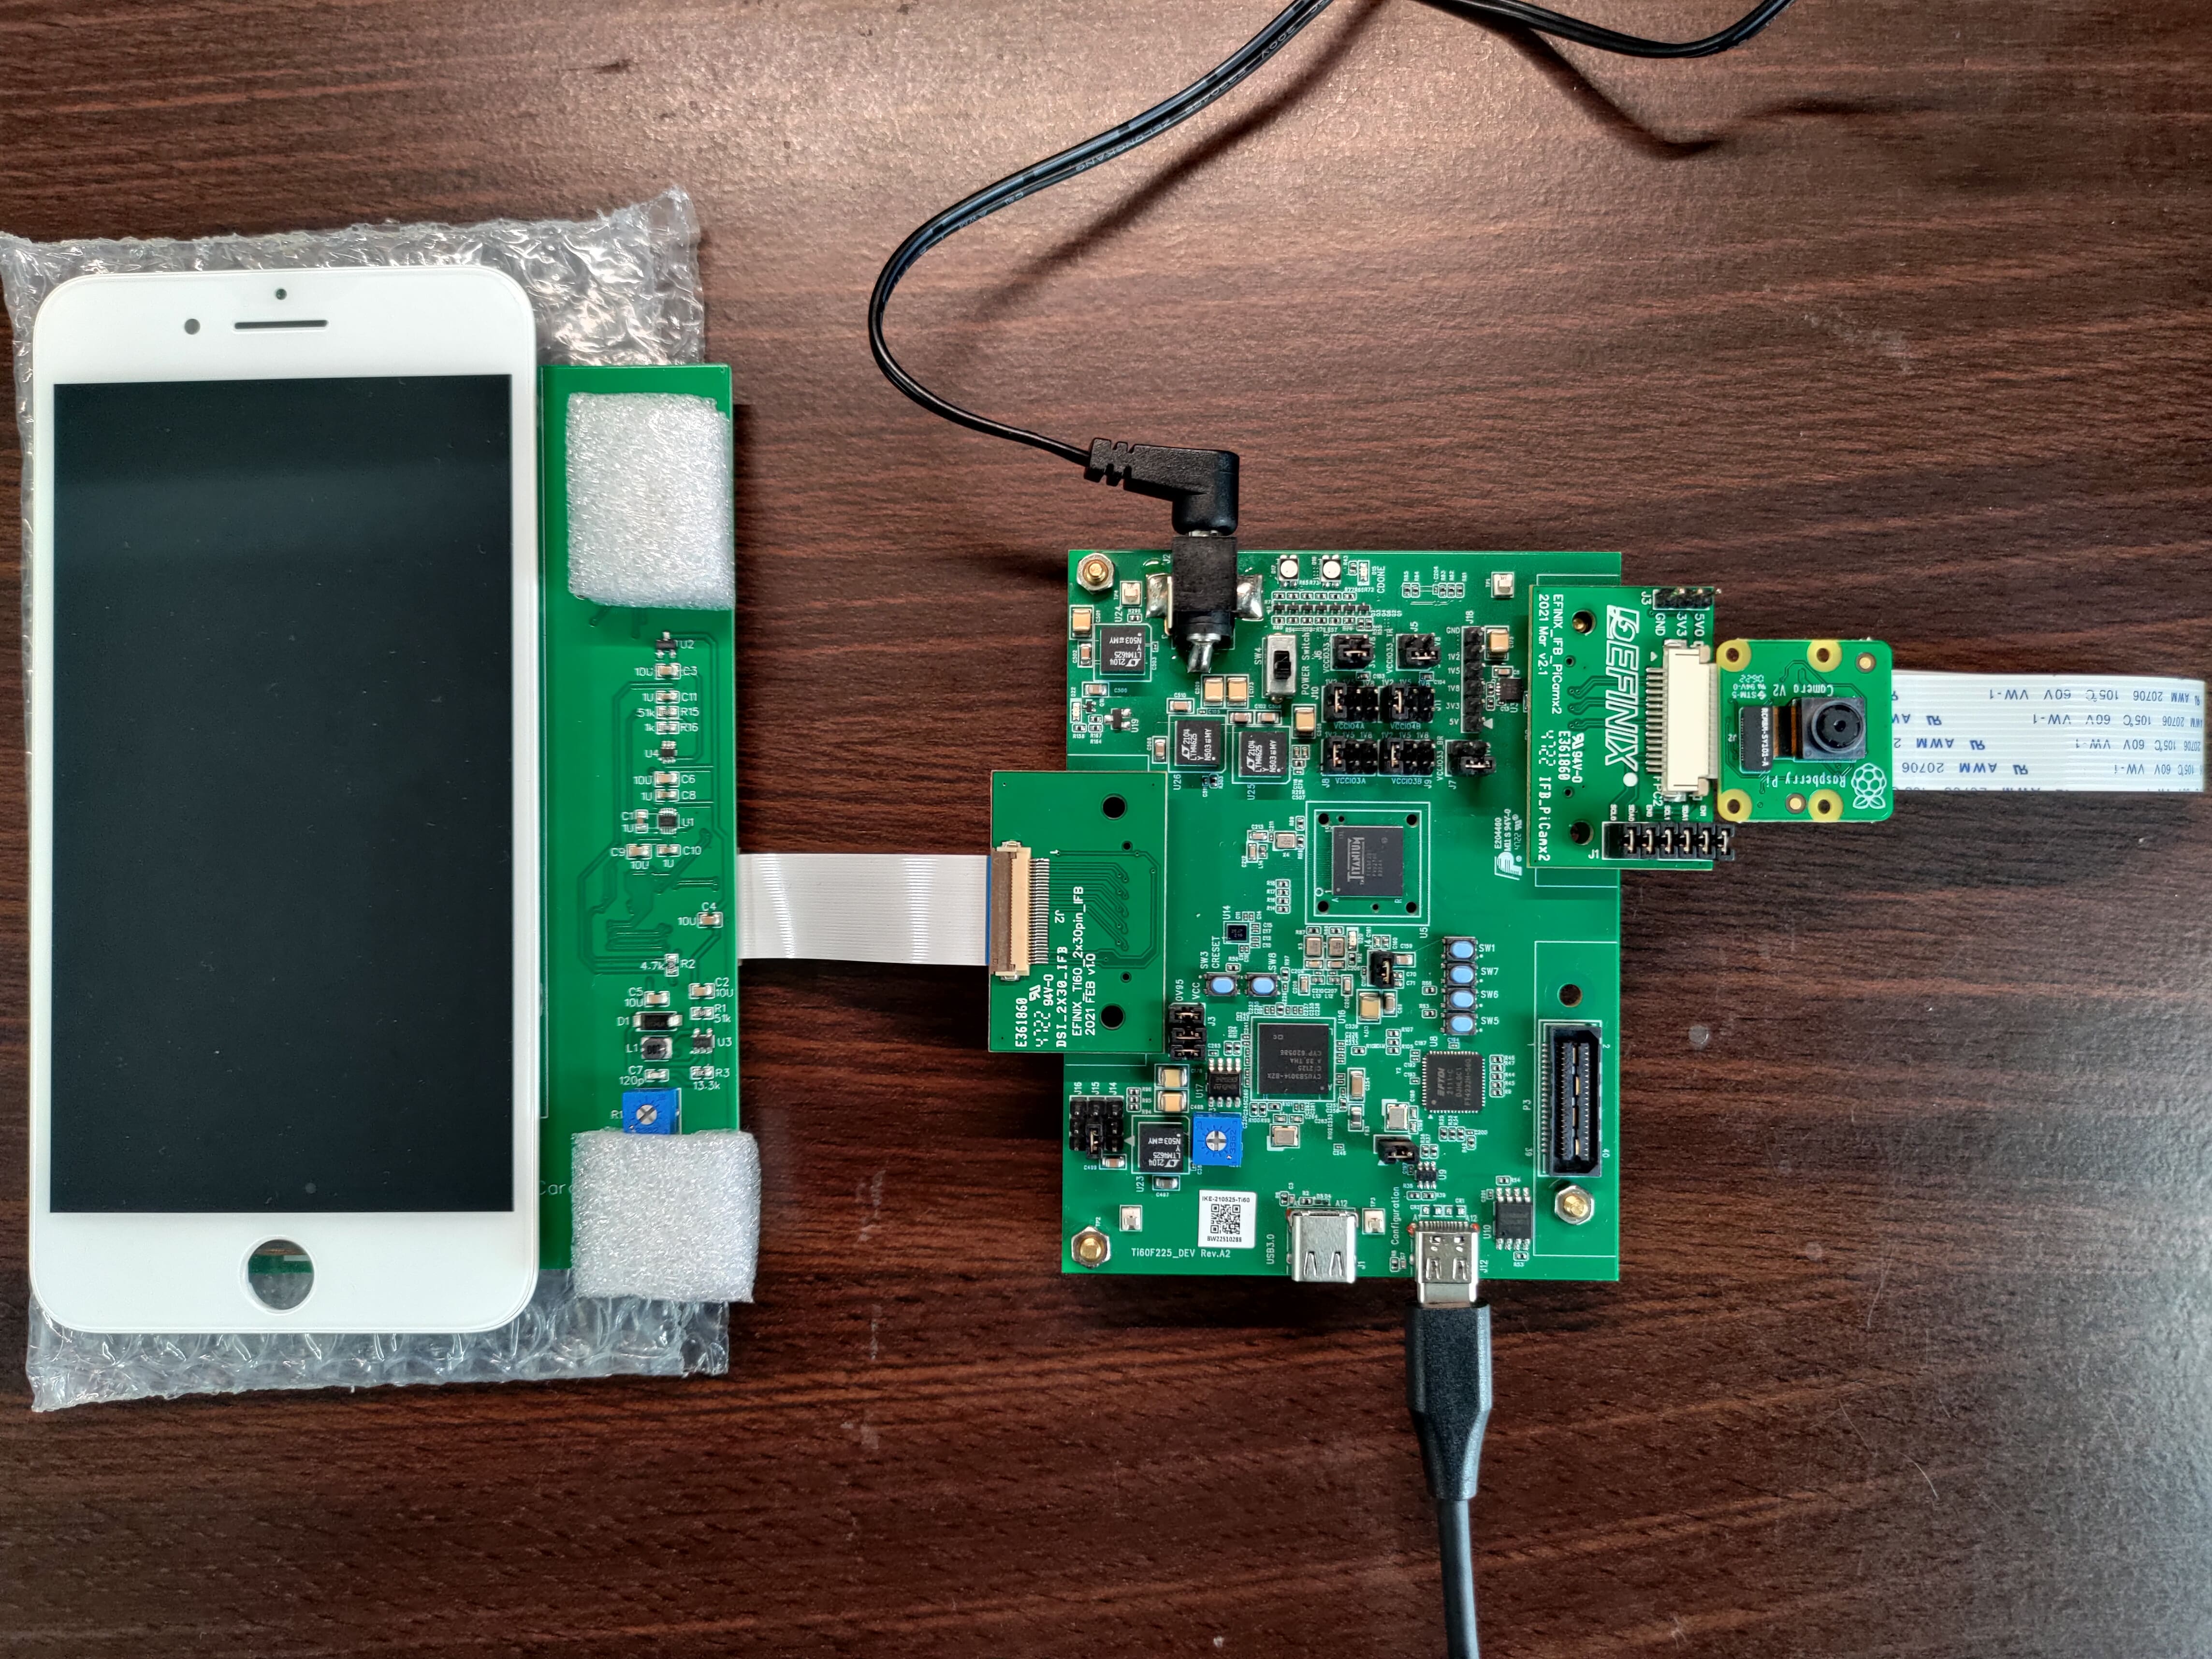
(1) 接線
需要的材料:
- 螢幕
- Mini-DSI Panel
- Mini-DSI Panel Connector Daughter Card
- Dual MIPI to DSI Converter Daughter Card + 排線
- 相機
- Raspberry Pi v2 Camera Module
- Dual Raspberry Pi Camera Connector Daughter Card
(2) Verilog Workflow(Efinity)
- Generate SapphireSoc IP
- Run synthesis, placement, routing, generate bitstream
詳細
詳細請參考TinyML Hello World
(3) Firmware(Efinity RISC-V)
- 以 RISC-V 開啟本文專案底下的
\embedded_sw\SapphireSocworkspace 路徑 - 在
File->Import...中,選擇Efinix Projects->Efinix Makefile Project - BSP location 選擇
\embedded_sw\SapphireSoc\bsp - 選擇
standalone底下的evsoc_tinyml_ypd專案
詳細
1~4 步驟詳細請參考TinyML Hello World
Warning
因官方提供的相機為 v2 版,需先自行將main.cc的相機版本變數改為 2
#define PICAM_VERSION 2 // <--原本為3

#include <stdlib.h>
#include <stdint.h>
#include "riscv.h"
#include "soc.h"
#include "bsp.h"
使用 TinyML Generator 生成轉換模型檔
選擇 yolo_person_detect.tflite
(optional) 開啟
CONV_DEPTHW_MODE的STANDARD選項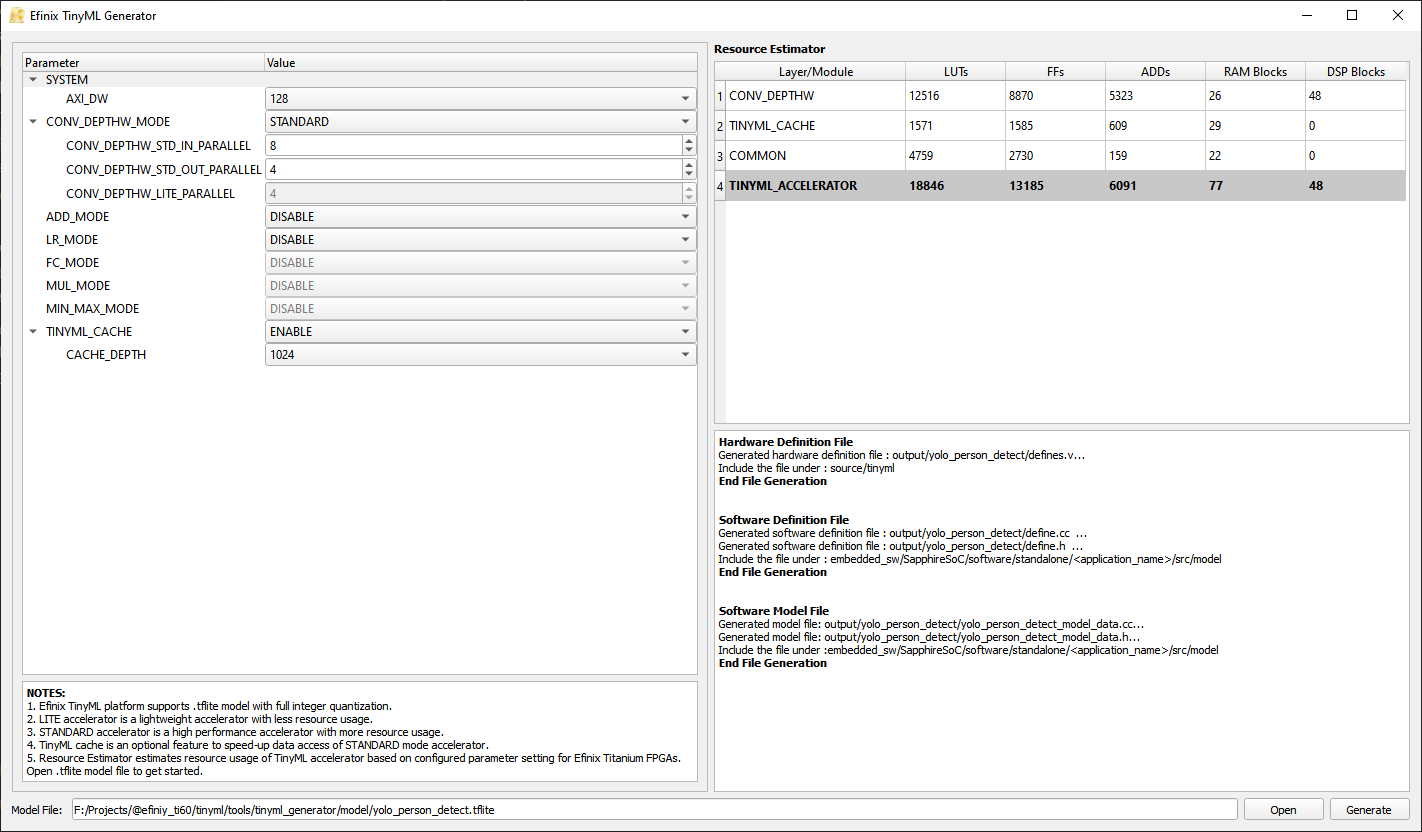
yolo_person_detect.tflite轉換 Warning
經測試,yolo_person_detect.tflite 僅可開啟
CONV_DEPTHW_MODE模式,否則將造成模型無法載入或辨識成功率下降將
output路徑下完成轉換的.c,.h,.v檔案,直接覆蓋evsoc_tinyml_ypd\model路徑的檔案Build
evsoc_tinyml_ypd專案(可按Run測試)
(4) 合併軟硬體 Image
請準備好以下 bitstream 檔案
outflow下的edge_vision_soc.hex-> (2)完成\embedded_sw\SapphireSoc\standalone\evsoc_tinyml_ypd\build下的evsoc_tinyml_ypd.bin-> (3)完成
在 Efinity 中,開啟 Programmer
點選 Combine Multiple Image Files 按鈕
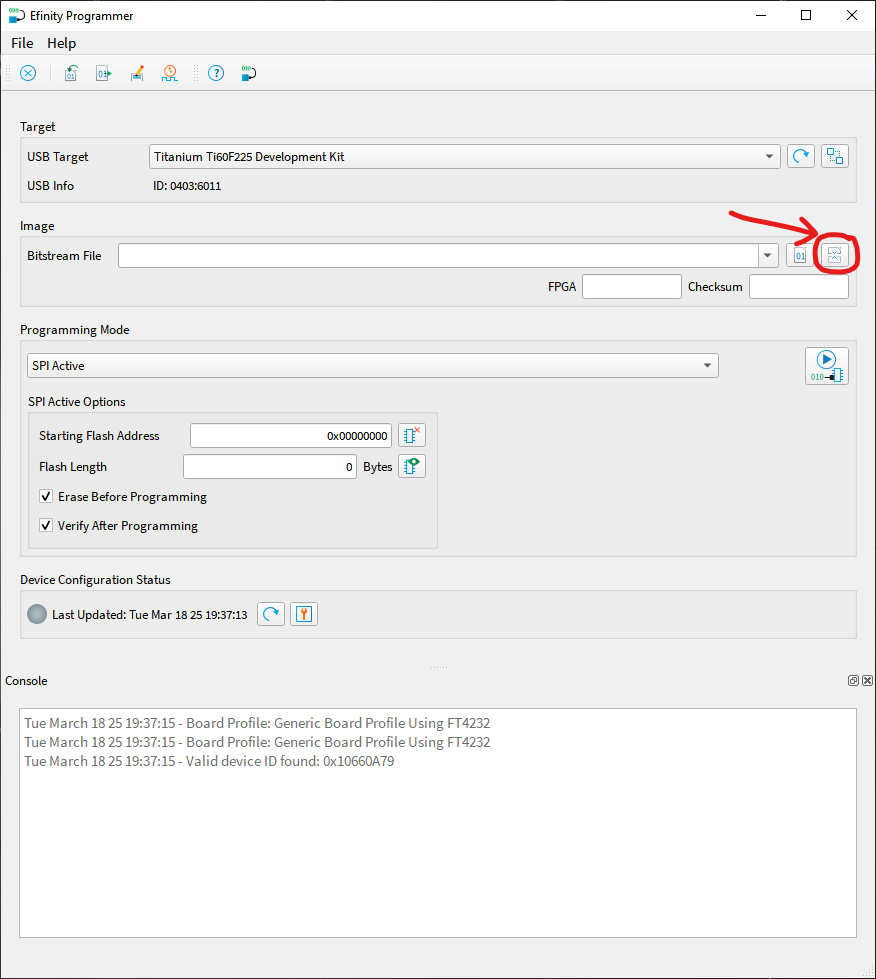
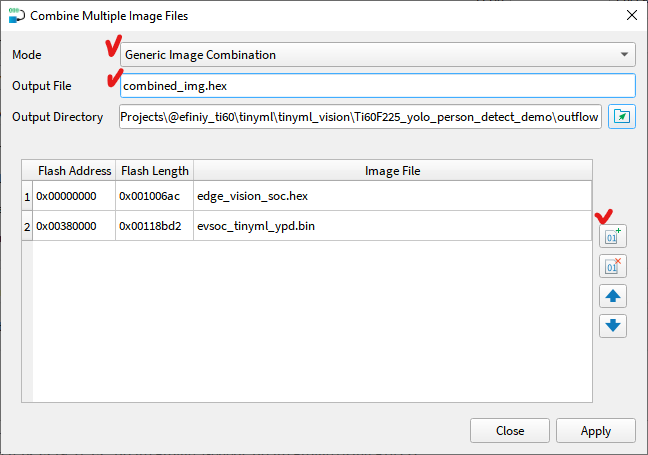
Combine Multiple Image Files按鈕位置 在彈出的視窗中,依下列選項設定
- Mode: Generic Image Combination
- Output File: 自行設定輸出檔案名稱,並以
.hex結尾 - Output Directory: 預設為
outflow路徑 - 點選右方 Add Image 按鈕,並依序加入
edge_vision_soc.hex及evsoc_tinyml_ypd.binWarning
Firmware 的 image 必須選擇
.bin檔案 - 設定 Flash Address
edge_vision_soc.hex: 0x00000000evsoc_tinyml_ypd.bin: 0x00380000
- 點選 Apply,合併後的檔案將生成於 Output Directory
- 回到 Programmer,Image File 選擇剛剛生成的合併 image(預設會自動選擇),點 Start Program